Sure! Here’s a detailed article titled “Windows 11: How to Install and Troubleshoot Upgrade Issues” written in clear and helpful language.
Thank you for reading this post, don't forget to subscribe!Windows 11: How to Install and Troubleshoot Upgrade Issues
Windows 11 is Microsoft’s latest operating system, offering a sleek design, improved performance, and enhanced productivity features. If you’re ready to make the switch or are facing challenges during the upgrade, this guide will walk you through the installation process and provide solutions to common problems.
✅ System Requirements for Windows 11
Before upgrading, make sure your PC meets the minimum system requirements:
- Processor: 1 GHz or faster with 2 or more cores on a compatible 64-bit processor
- RAM: 4 GB or more
- Storage: 64 GB or larger
- System firmware: UEFI, Secure Boot capable
- TPM: Trusted Platform Module (TPM) version 2.0
- Graphics card: Compatible with DirectX 12 or later with WDDM 2.0 driver
- Display: >9” with HD Resolution (720p)
- Internet: Internet connection is required for updates and to download certain features
To check compatibility, use Microsoft’s PC Health Check Tool.
💻 How to Install Windows 11
Method 1: Upgrade via Windows Update
- Go to Settings → Update & Security → Windows Update
- Click Check for updates
- If your PC is eligible, you’ll see the Windows 11 upgrade option
- Click Download and install
- Follow the on-screen instructions
Method 2: Install via Installation Assistant
- Download the Windows 11 Installation Assistant from the official Microsoft website
- Run the tool and accept the license terms
- Follow the prompts to complete installation
Method 3: Create Installation Media (USB Drive)
- Download the Media Creation Tool from the Microsoft site
- Run the tool and choose Create installation media for another PC
- Select language, edition, and architecture
- Use a USB drive (at least 8 GB) to create bootable media
- Boot your PC from the USB and follow the installation instructions
🛠️ Common Windows 11 Upgrade Problems and Fixes
1. PC Doesn’t Meet Requirements
- Use the PC Health Check Tool to verify eligibility
- Enable Secure Boot and TPM 2.0 in BIOS/UEFI settings
- If TPM 2.0 is not supported, you can use workarounds (not officially recommended)
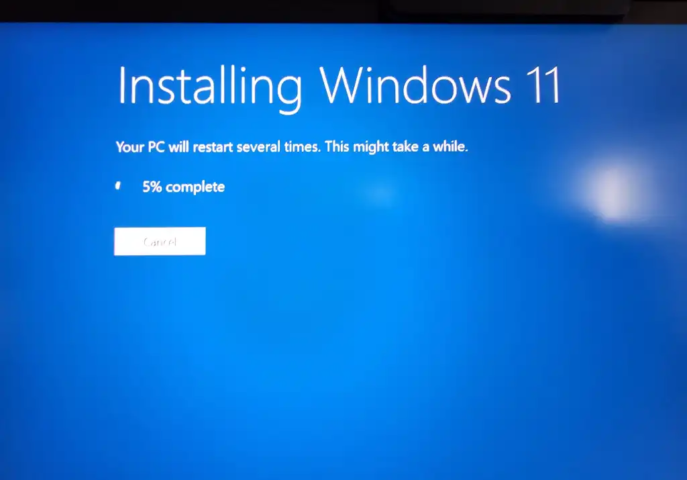
2. Installation Stuck at a Certain Percentage
- Solution: Restart your PC and try again
- Disable any third-party antivirus or firewall
- Make sure your internet connection is stable
3. Error Code 0x8007007f (Installation Assistant)
- Run the Installation Assistant as Administrator
- Free up disk space (at least 20 GB recommended)
- Ensure all Windows 10 updates are installed before upgrading
4. Missing Drivers After Upgrade
- Open Device Manager and check for driver updates
- Visit your PC manufacturer’s website for the latest drivers
- Use Windows Update to download missing drivers
5. Rollback to Windows 10
If Windows 11 causes issues and you want to revert:
- Go to Settings → System → Recovery
- Under Go back, click Go back to Windows 10
- Follow the instructions (available for 10 days after upgrade)
🔒 Tips for a Smooth Windows 11 Installation
- Backup your files before upgrading
- Uninstall unnecessary apps to free up space
- Keep your laptop plugged in during the installation
- Use an SSD for faster installation and performance
- Perform a clean install if performance issues persist
📌 Final Thoughts
Windows 11 brings a modern experience, better multitasking, and improved gaming capabilities. While most users can upgrade without issues, knowing how to troubleshoot can save time and frustration. Always ensure your hardware is compatible, your data is backed up, and follow Microsoft’s official guidelines for the best experience.
Windows 11 Installation Very Slow? Here’s How to Fix It
Windows 11 Installation Very Slow? Here’s How to Fix It
Installing Windows 11 should be a smooth process, but for many users, it can become painfully slow or even seem stuck. If you’re facing slow installation or upgrade times, don’t worry. This guide covers the most common causes and effective solutions to speed things up.
🕒 Why Is Windows 11 Installing So Slowly?
Several factors can cause a slow installation:
- Low disk space or slow hard drive
- Outdated or corrupted drivers
- Background apps interfering with installation
- Poor internet connection (especially during updates)
- Missing system requirements
- Using a USB drive with slow read/write speed
✅ How to Fix a Slow Windows 11 Installation
1. Check Your Internet Connection
If you’re upgrading online (via Windows Update or Installation Assistant):
- Use a stable, high-speed connection
- Avoid using Wi-Fi if possible; try a wired Ethernet connection
- Pause downloads or streaming from other devices on your network
2. Free Up Disk Space
Lack of storage can slow down or even block the install.
- Open Settings > System > Storage
- Use Storage Sense to remove junk files
- Delete temporary files using Disk Cleanup
- Keep at least 20–30 GB of free space
3. Disable Antivirus Temporarily
Third-party antivirus software can interfere with installation.
- Temporarily disable any non-Microsoft antivirus
- Reactivate it once the installation is complete
4. Use an SSD Instead of HDD
Installing on an SSD (Solid State Drive) is significantly faster than on a traditional HDD.
- If possible, upgrade your storage drive
- Even cloning your old drive to an SSD before installing can make a big difference
5. Disconnect Unnecessary Peripherals
Remove devices that aren’t essential:
- Printers, external hard drives, USB hubs, etc.
- Stick to just the keyboard, mouse, and display during installation
6. Update Your BIOS and Drivers
Outdated BIOS or drivers can slow down the process or cause compatibility issues.
- Visit your PC manufacturer’s website for BIOS and chipset driver updates
- Update graphics and network drivers
7. Run Windows Installation in Clean Boot Mode
This prevents background services from interfering.
- Press Win + R, type
msconfig, and press Enter - Under the Services tab, check Hide all Microsoft services → Click Disable all
- Restart and run the installation again
8. Use a Faster USB Drive (If Using Installation Media)
If you’re installing from a USB:
- Use a USB 3.0 or higher flash drive
- Plug it into a USB 3.0 port (usually blue inside)
- Make sure the ISO file is properly written using the Media Creation Tool
9. Wait It Out (Sometimes It Just Takes Time)
In some cases, especially on older hardware:
- The process might look stuck, but it’s working in the background
- Wait for at least 1–2 hours before assuming it’s frozen
- Look for signs like a spinning circle, changing percentage, or disk activity
10. Do a Clean Installation Instead of Upgrade
Upgrading from Windows 10 can carry over issues. A clean install often resolves delays:
- Backup your files
- Create bootable media using the Media Creation Tool
- Boot from USB, wipe the existing partitions, and do a fresh install
🔁 Still Stuck? Try These Extras
- Run CHKDSK:
chkdsk /f /rin Command Prompt - Scan for corrupt files:
sfc /scannow - Use Windows Troubleshooter: Settings → Update & Security → Troubleshoot
🧠 Final Thoughts
A slow Windows 11 installation can be frustrating, but with a few tweaks, you can greatly reduce the wait time. Whether it’s freeing up space, using faster hardware, or updating your drivers, these steps can help you get back on track.
Need help with a specific step? Just ask!
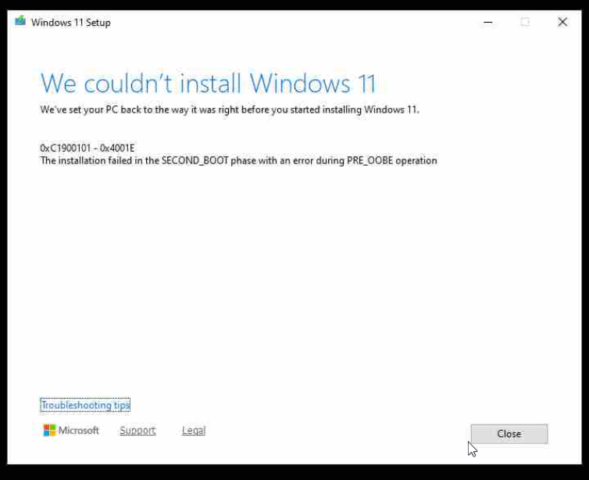
The error you’re seeing:
0xC1900101 – 0x4001E
The installation failed in the SECOND_BOOT phase with an error during PRE_OOBE operation
is a common Windows installation failure code and typically relates to driver issues or hardware compatibility problems during the upgrade to Windows 11.
🔍 What the error means:
- 0xC1900101: Indicates a driver issue, often a problematic or outdated device driver.
- SECOND_BOOT phase: This phase occurs after Windows Setup reboots for the second time.
- PRE_OOBE operation: This is just before the Out-of-Box Experience (OOBE), where Windows prepares the system for first use.
🛠️ How to fix it 0xC1900101 – 0x4001E
✅ 1. Update all device drivers
- Especially for: display (GPU), network, chipset, storage (SATA/NVMe), and audio drivers.
- Use Device Manager or go to the manufacturer’s site (e.g., NVIDIA, Intel, AMD, Realtek).
✅ 2. Unplug unnecessary hardware
- Disconnect USB drives, printers, external HDDs, etc., and only keep keyboard and mouse.
✅ 3. Disable third-party antivirus or security software
- These tools can block system changes during setup. Temporarily disable them.
✅ 4. Free up system space
- Ensure at least 20 GB of free space on your C: drive.
✅ 5. Run Windows Update Troubleshooter
- Go to
Settings > Update & Security > Troubleshoot > Windows Update
✅ 6. Check for disk errors
Run these commands in Command Prompt (as admin):
chkdsk /f /r
sfc /scannow
DISM /Online /Cleanup-Image /RestoreHealth
✅ 7. Try upgrading using the Windows 11 ISO
- Download the latest ISO from the Microsoft website.
- Mount the ISO, run
setup.exe, and choose Keep personal files and apps.
If you want, I can help analyze specific logs like setupact.log or setuperr.log — these are found in:
C:\$WINDOWS.~BT\Sources\Panther\
Let me know if you want help checking them!
🖥️ PC Health Check-Up: Why It Matters & How to Do It Right
In the digital age, your computer is more than just a device—it’s your workspace, entertainment hub, and personal archive. Like any well-used machine, it needs regular check-ups to stay in peak condition. A PC health check-up not only improves performance but can also extend the lifespan of your system and protect it from threats. Here’s a breakdown of what a proper check-up involves and how to do it.
🔍 Why PC Health Check-Ups Are Important
- Performance Boost: Over time, your PC can slow down due to clutter, background processes, and outdated drivers.
- Security: Regular scans help catch malware or spyware before it causes damage.
- Storage Management: Identifying and clearing unused files can free up valuable space.
- Hardware Monitoring: Detect failing components early to avoid system crashes.
- Software Updates: Keeping your OS and apps updated fixes bugs and patches vulnerabilities.
🛠️ What to Include in a PC Health Check-Up
1. Disk Cleanup
- Remove temporary files, old downloads, and system junk.
- Tools: Windows Disk Cleanup, CCleaner, or built-in macOS storage management.
2. Antivirus & Malware Scan
- Run a full system scan with updated antivirus software.
- Consider using tools like Malwarebytes for deeper scans.
3. Software & Driver Updates
- Update your operating system.
- Use tools like Driver Booster or Windows Update for drivers.
4. Startup Program Audit
- Disable unnecessary apps that slow boot time.
- On Windows:
Task Manager > Startup - On macOS:
System Settings > Users & Groups > Login Items
5. Hardware Check
- Monitor CPU temperature, RAM usage, and hard drive health.
- Tools: HWMonitor, CrystalDiskInfo, Speccy.
6. Back Up Your Data
- Always back up important files to an external drive or cloud storage.
- Use tools like File History (Windows), Time Machine (macOS), or cloud services like Google Drive or OneDrive.
7. Defragment & Optimize Drives
- Only for HDDs (not SSDs). Use Windows’ built-in defragmentation tool.
⏰ How Often Should You Do a PC Health Check?
- Basic Cleanup & Scan: Weekly or bi-weekly
- Full Check-Up: Once a month
- Hardware Diagnostics & Backups: Every 3–6 months
🧰 Bonus: Top Tools for a Smooth PC Health Check
| Tool | Use |
|---|---|
| CCleaner | Junk file removal & registry cleaner |
| Malwarebytes | Deep malware scanning |
| HWMonitor | Hardware temperature and usage |
| CrystalDiskInfo | HDD/SSD health check |
| Driver Booster | Automatic driver updates |
| Windows Security | Built-in antivirus (Windows 10/11) |
🧠 Final Thoughts
Think of your computer like a car—it runs best when maintained regularly. A PC health check-up doesn’t take long, but it can save you from bigger headaches like data loss, poor performance, or system failure down the road. Set a reminder, follow these steps, and keep your system running smoothly and securely.